BACKDROPS, CUTTINGS AND MASKING TAPE!

Backdrops are what define your layout, it could be and industrial scene, country scene, hillsides or plain old sky. They are fixed to your back board using double sided tape which will help stop the “bubbling” effect you get with glue.

Once you have your back boards done then you can add the tunnel mouths, retaining walls, cuttings, grass banks etc. These are the things that surround all railways. Most railway lines are built into the landscape not the other way round. Quite often cuttings were cut through hills to keep the track on an even keel.

As you can see I started off by glueing cardboard to the baseboards and back scene to create my landscape, this doesn’t have to be too presice as this will be covered. At this point you are just creating a basic landscape. Offcuts of wood are used to create a flat surface for the retaining walls.

Somebody once said “every picture paints a thousand words” and in this case I believe that to be true

To create the contours of my layouts world I use good old masking tape, three to four layers should do it and once covered with PVA glue and dry you will have a solid structure to add detailing. Before adding however paint it green for hillsides and brown for trackside this gives a base to work with and any small gaps will not show through.

You will see that this is a good time to check your buildings will fit into your landscape, better to find out now if you need to tweak your cuttings.

So next up I’ll be finishing the back round by adding grass, bushes etc and also building a Metcalfe goods shed.

So for now happy modelling.

Alan.

RUSTY TRACKS BUT WE HAVE THE POWER!

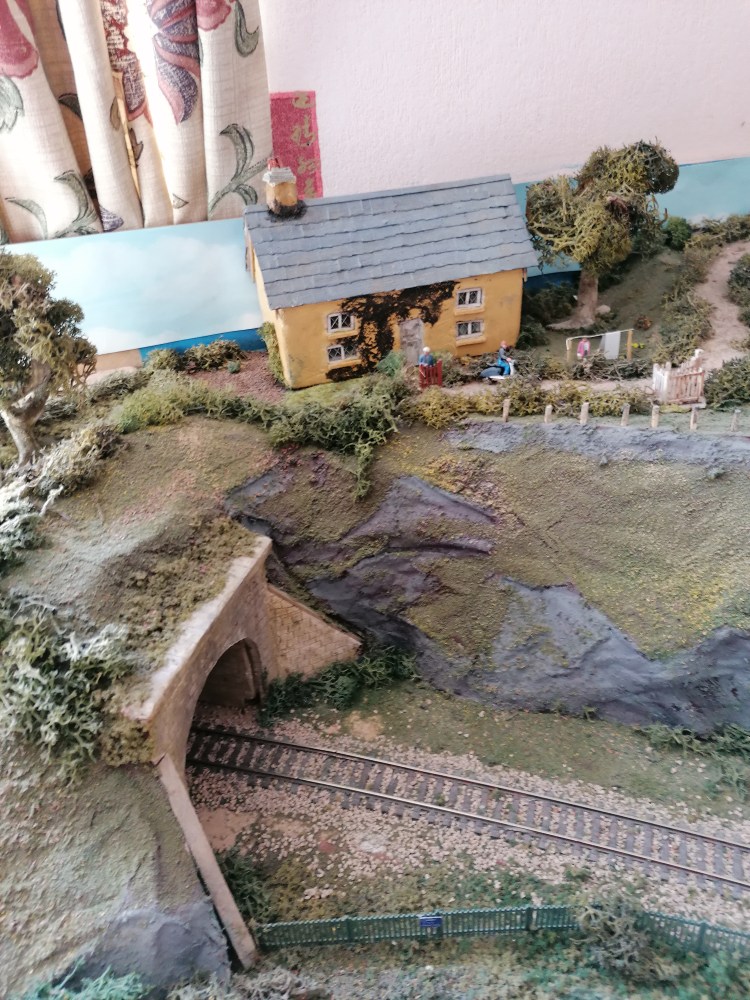
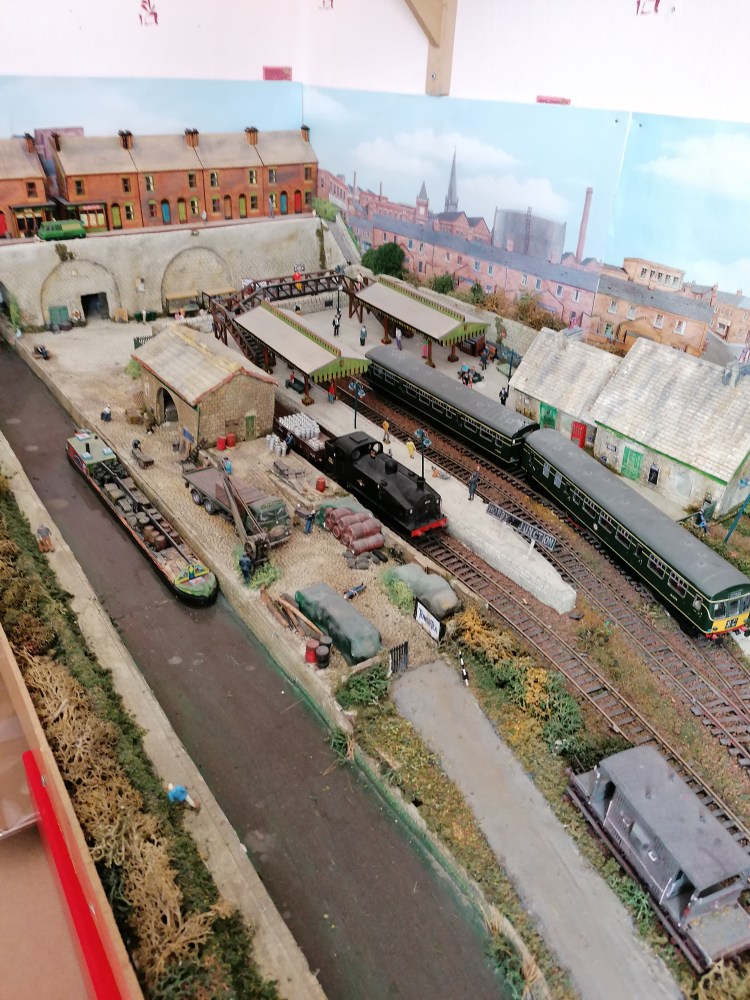
Hello and welcome once again to my blog on building my model railway SHIREBROOK YARD.

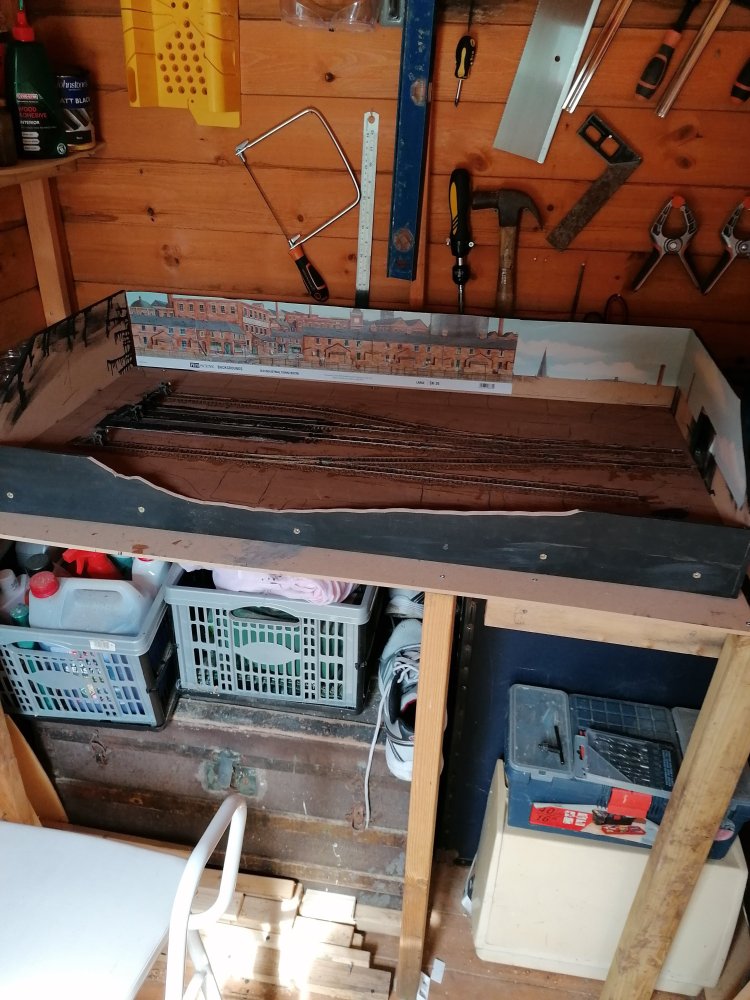
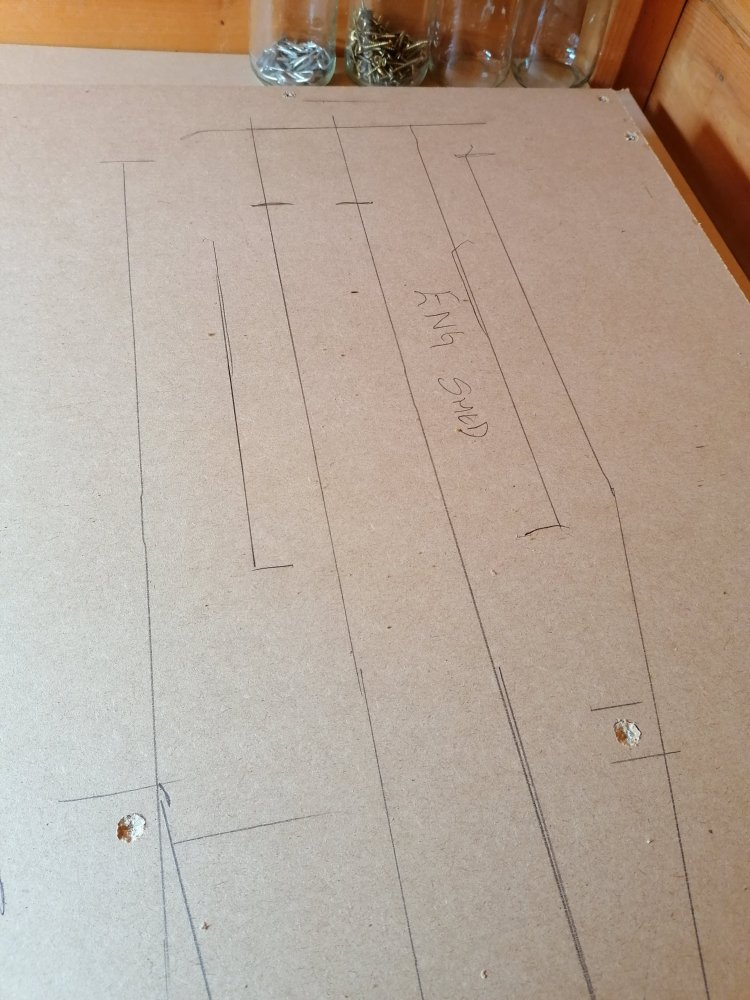
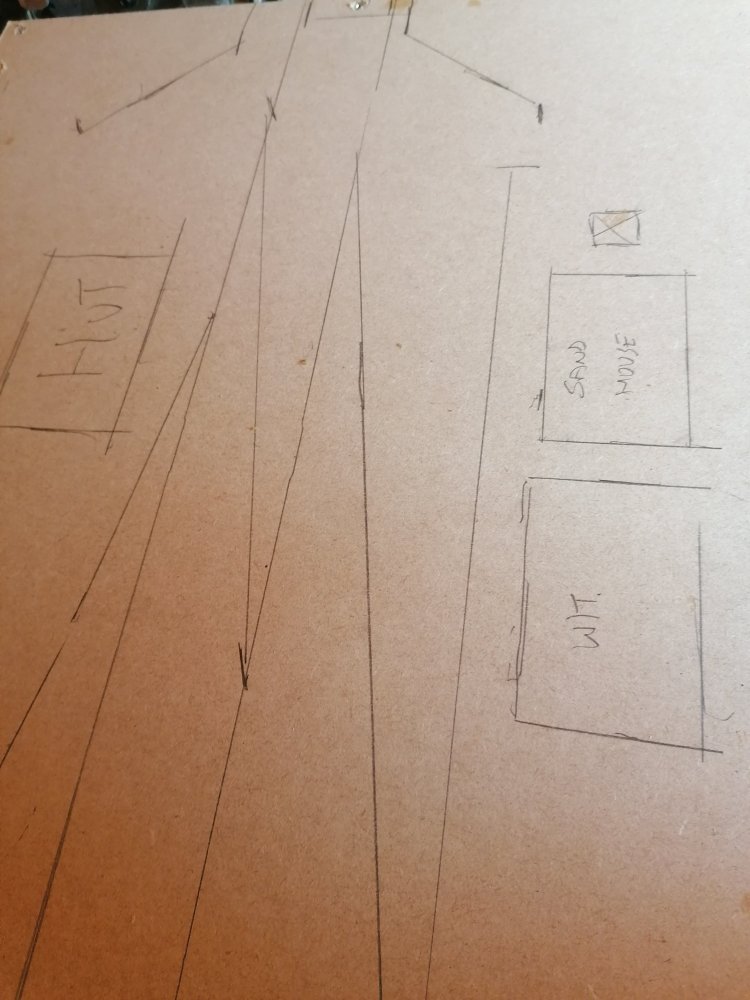
So last time the track plan was decided, checked on the base board so now for the fun part! In the end a model railway is about bringing a diorama to life, I can assure you the moment you turn the dial on the controller and the engine moves is not only a relief but also realisation that your planning has worked.

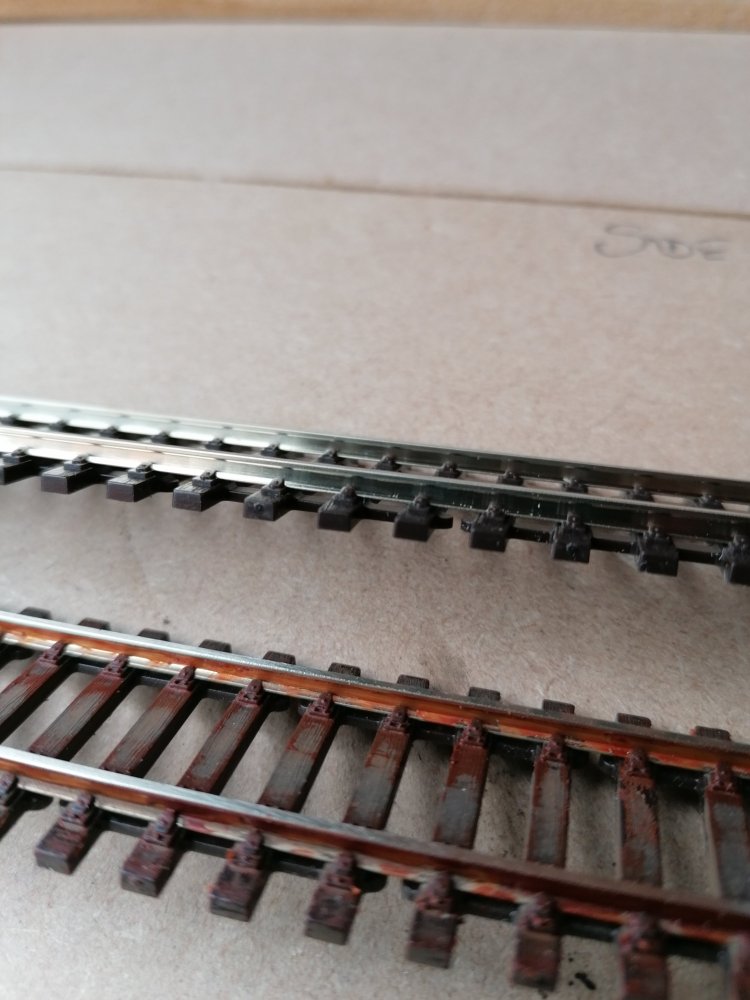
So your thinking he’s going to show us how to lay the track… Well yes but before that we have to weather it.

WEATHERING THE TRACK.

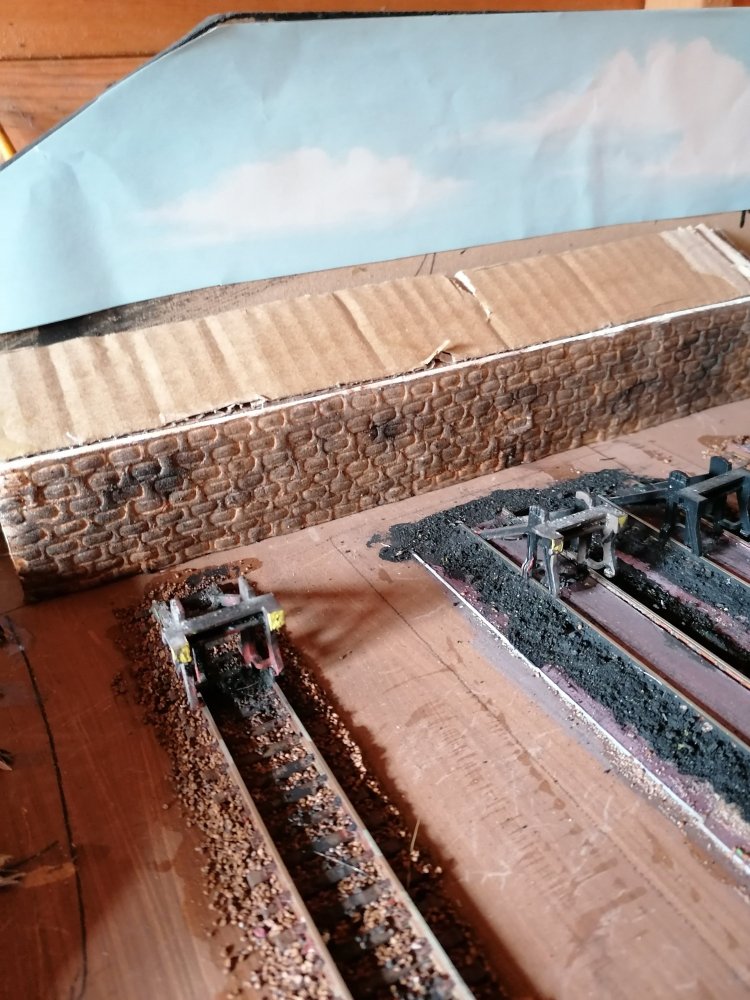
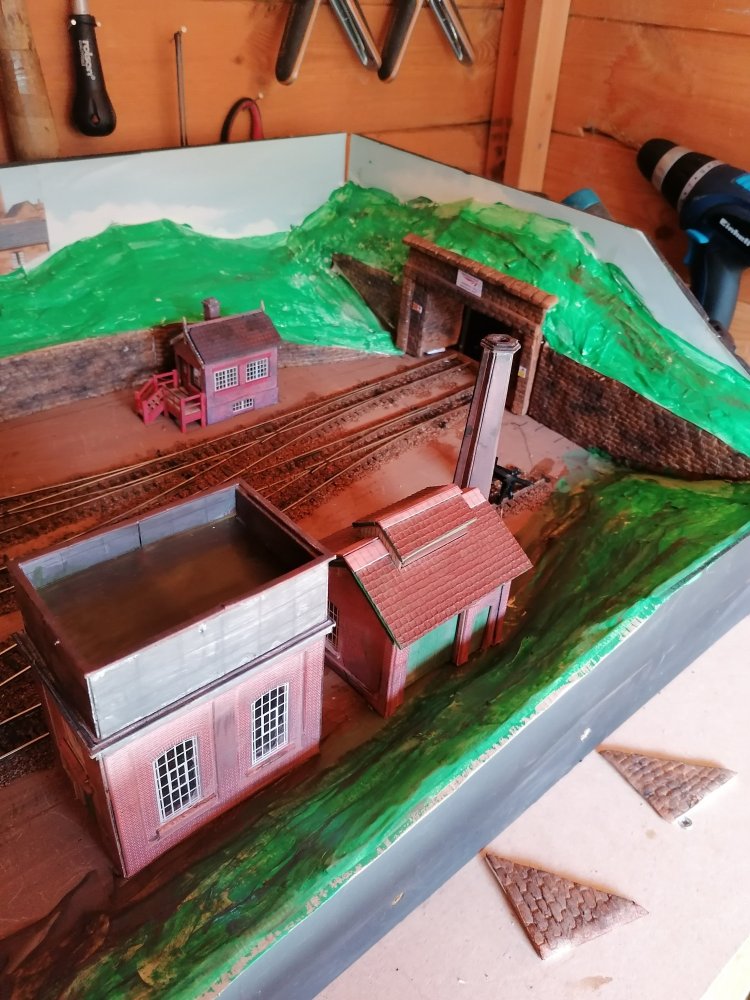
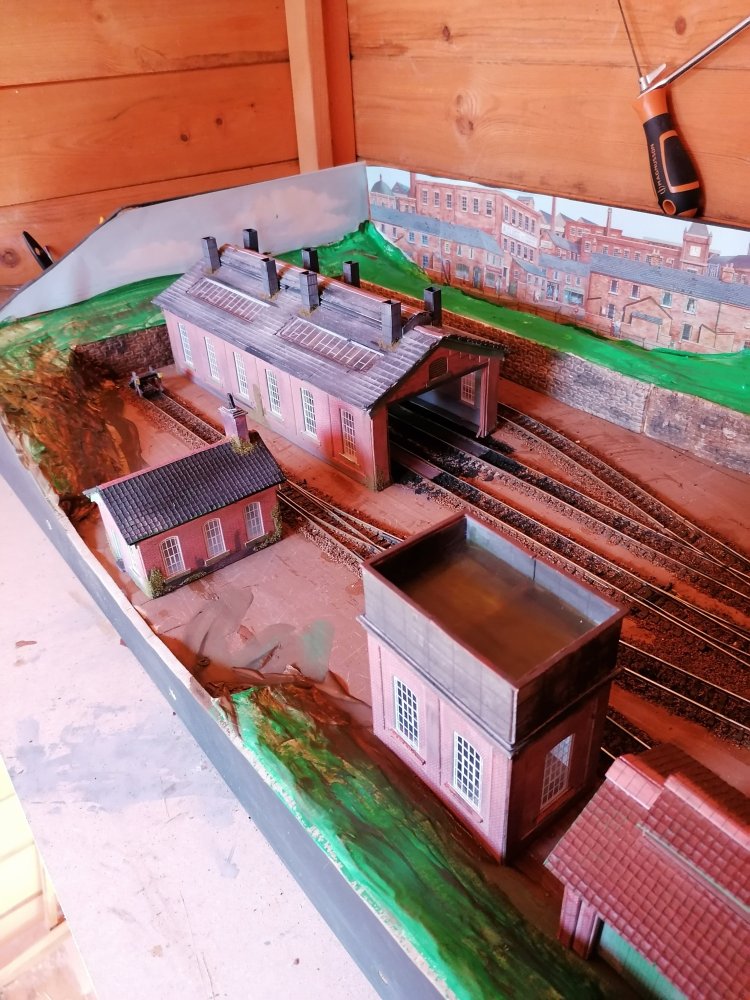
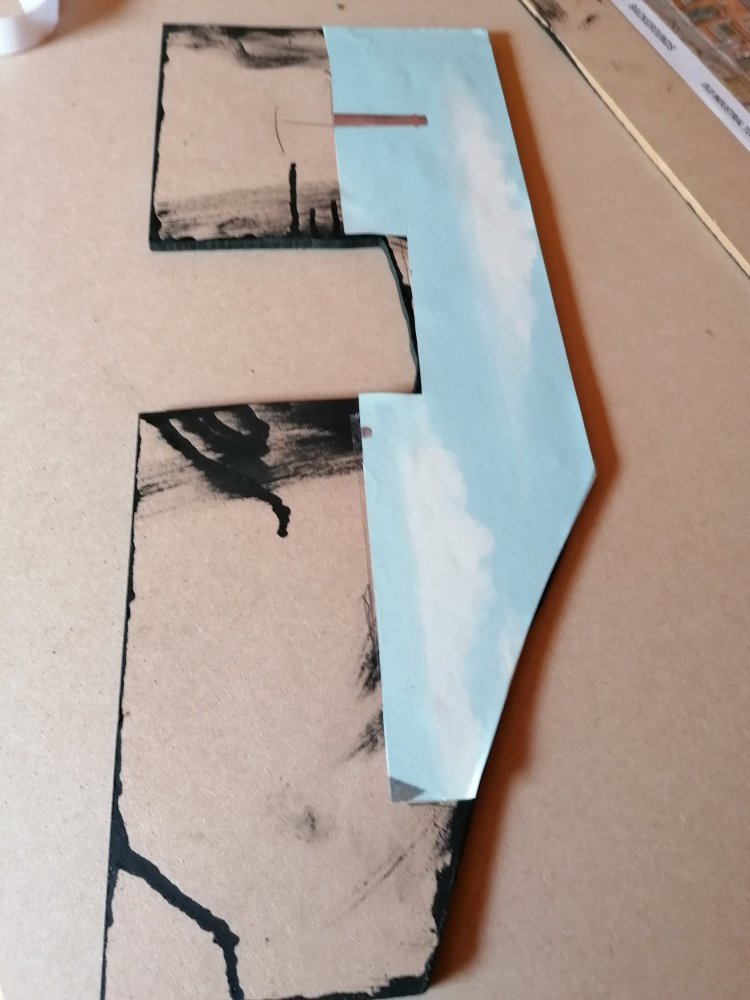
When you buy your track it will be all new and shinny but offcourse in the real world it won’t look like this. As you can see below the before and after look. Like most things in modelling there’s more than one to skin a cat, you can spray your track or in my case paint it.

First thing to do is mix up a “grime” for the sleepers, I tend to mix green and brown together. This gives the appearance of years of coal, grease and the vagaries of the British weather and when buried into the ballast it will loose that shinny look.

As for the rails, we’ll they need to simply look old and rusty. To do this again simple acrylic burnt umber will give you a rusty look, just paint it on. Don’t get too worried about getting it on the tops of the rails as it can be cleaned off using a track rubber when dry. As for the sleepers just blend in.

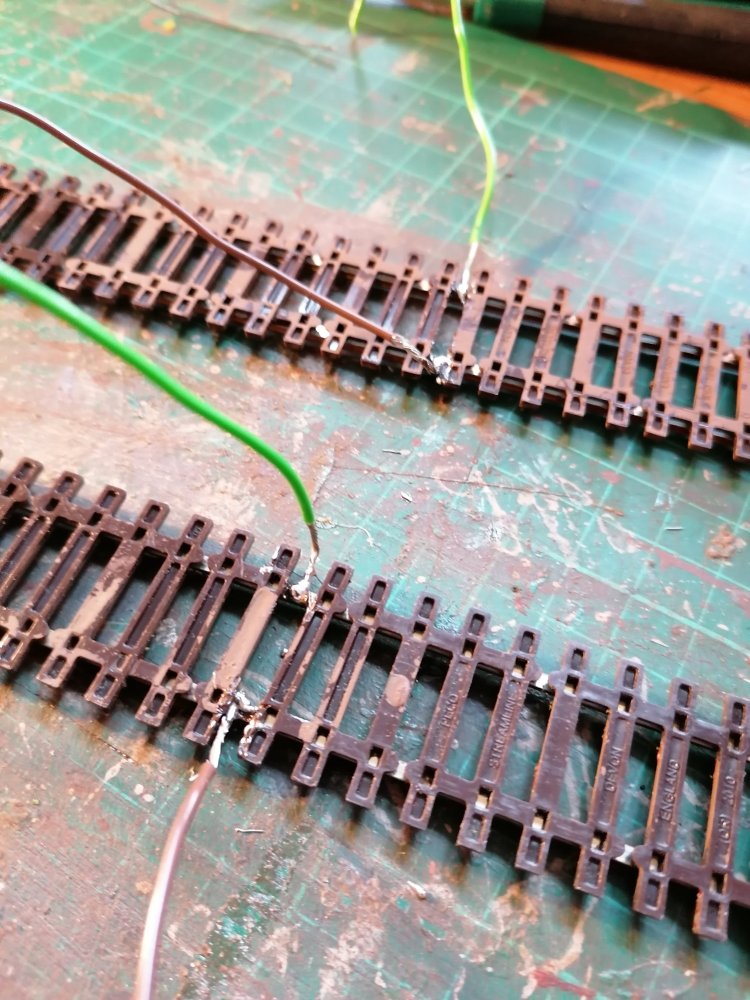
So now the track is ready for laying on the base board, right? Well no actually because we need POWER!

ELECTRICS.

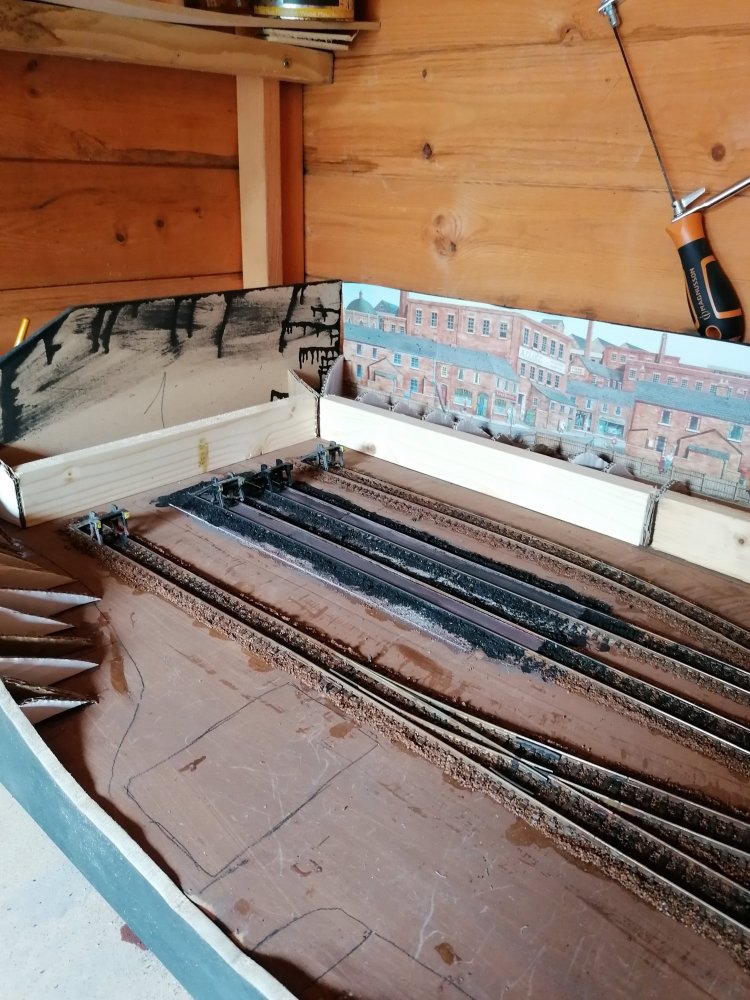
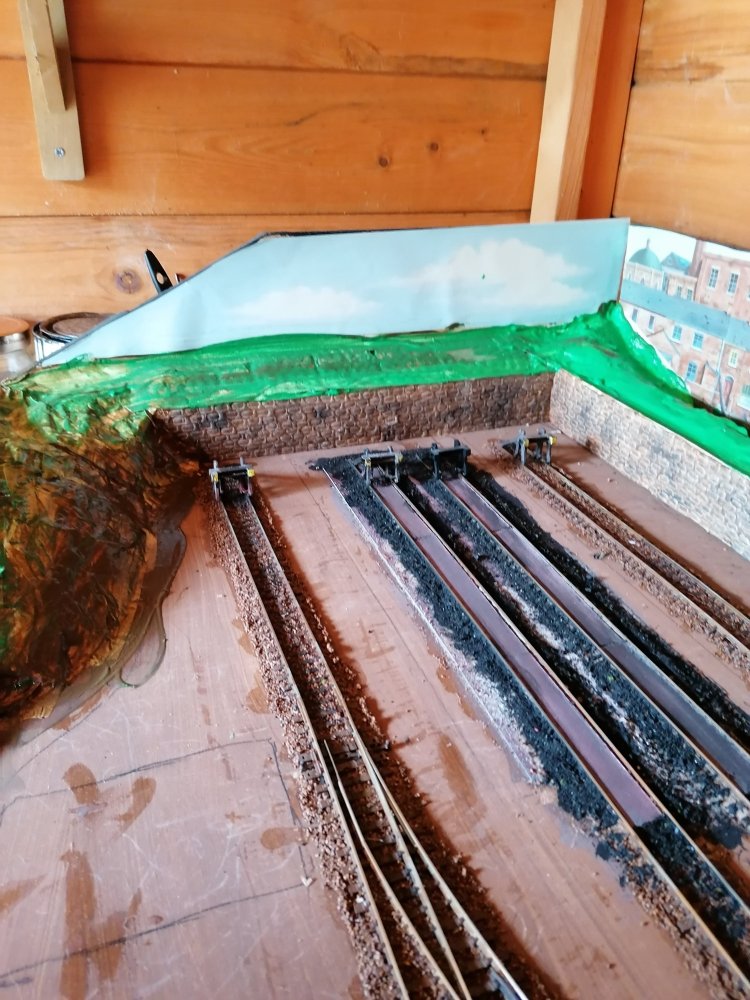
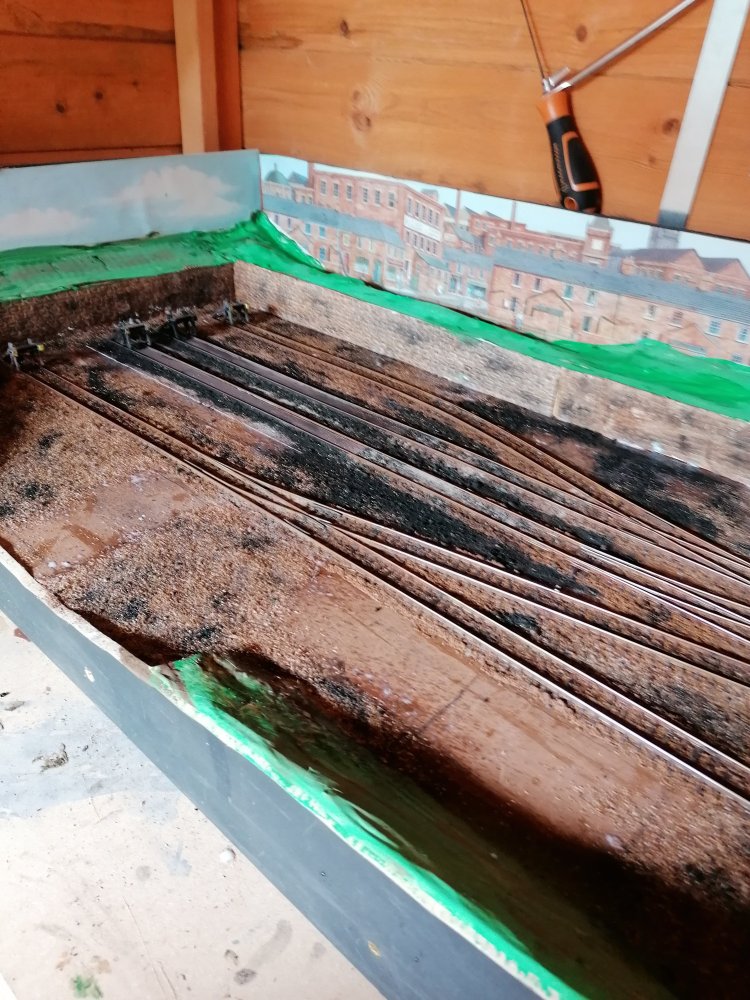
This is a simple operation however, to power the BUS (will explain later) you you will need dropper wires which are simply soldered to the underside of the track about 12 inches apart and fed through holes pre drilled in the baseboard. As you can see below.

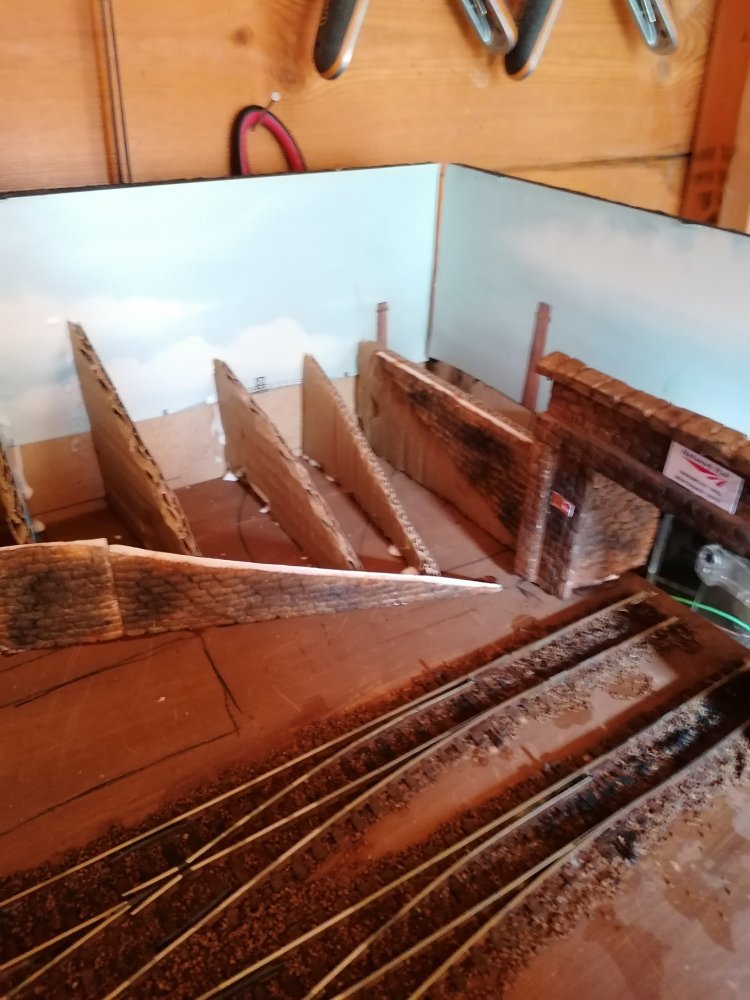
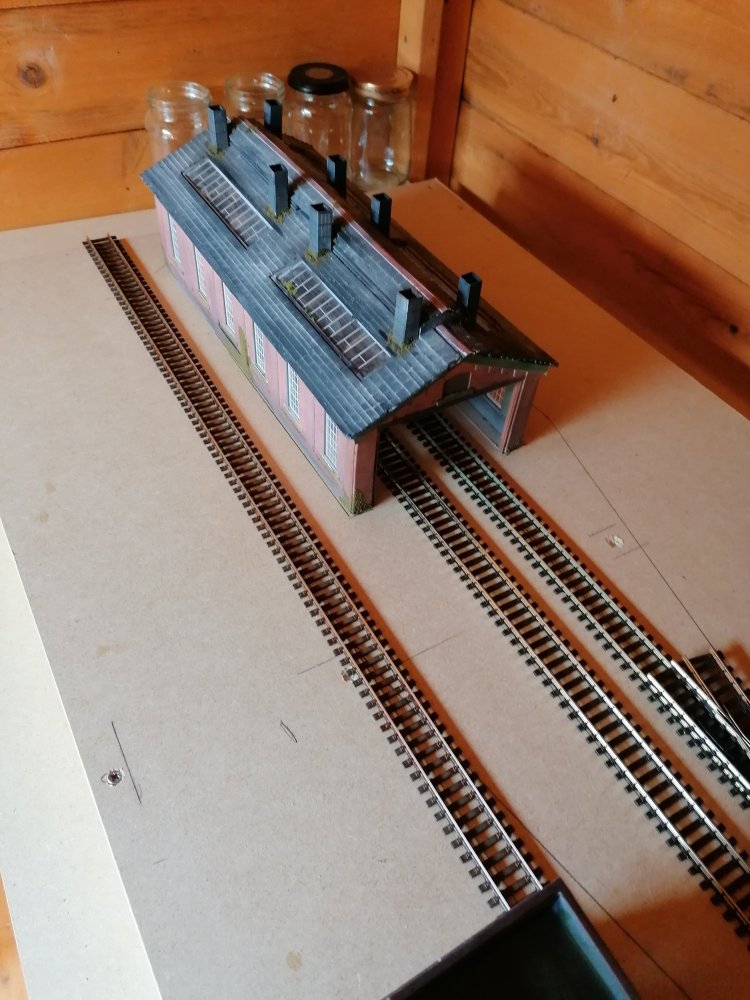
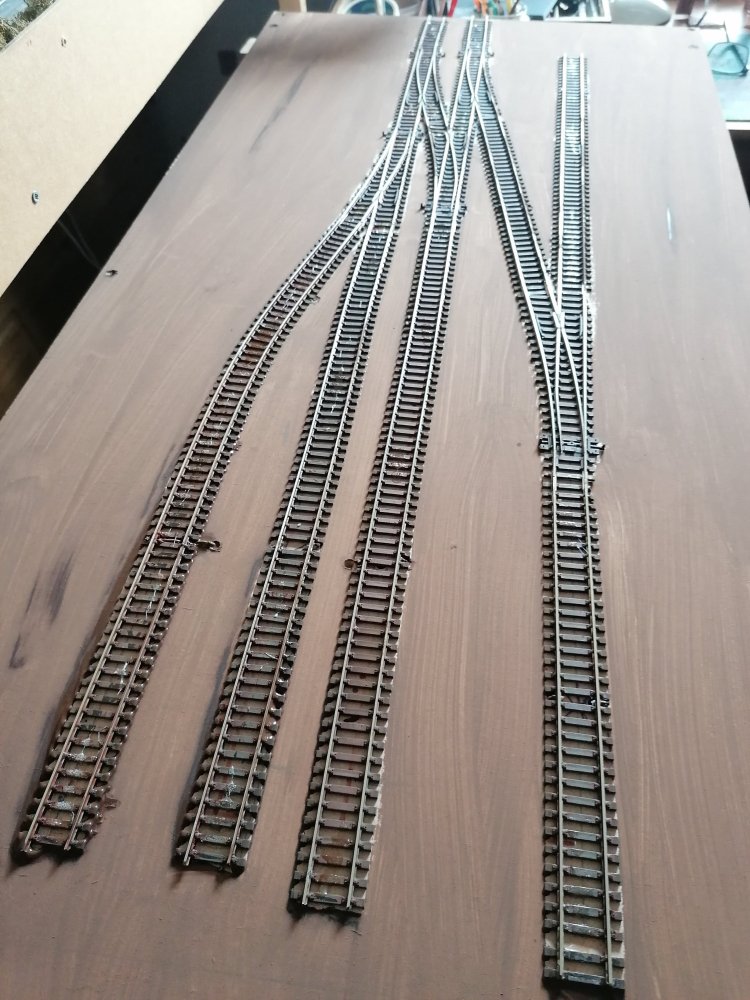
Now can we lay some track? YES!

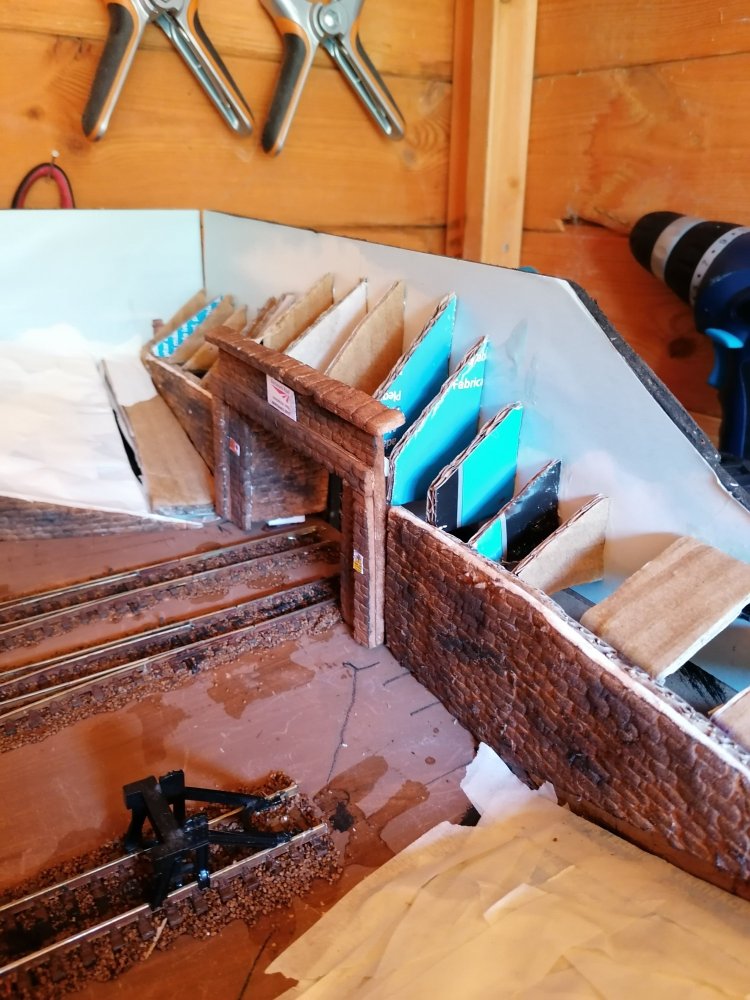
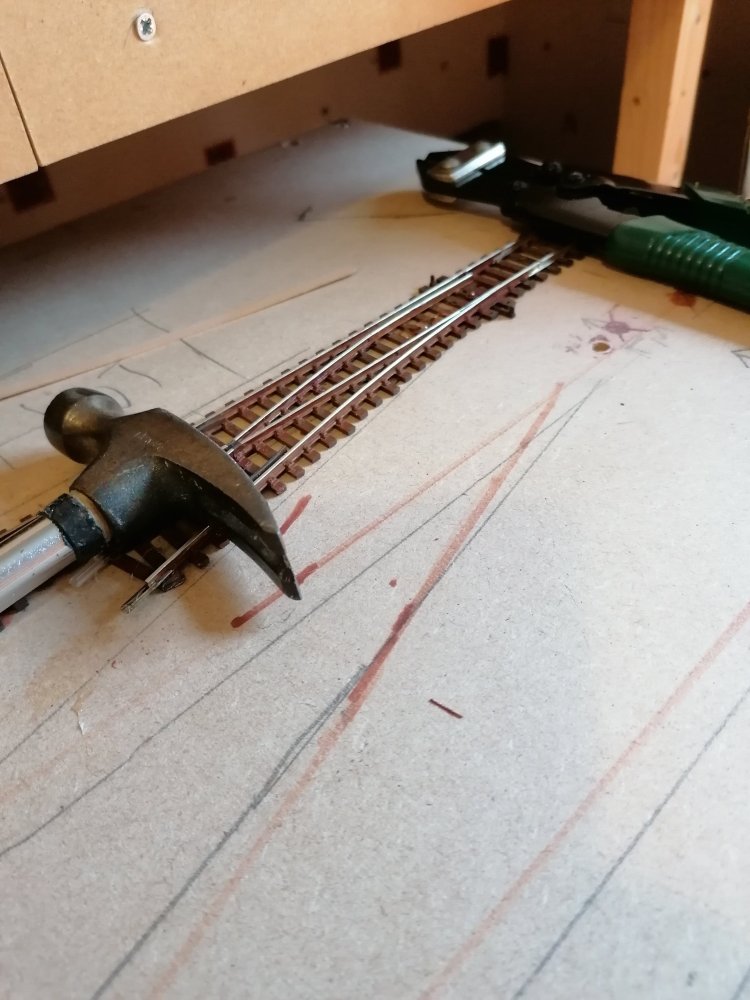
First get all your track laid out where you want it to run, this will ensure your dropper wire holes are all in the correct place and the track all joins together giving good electrical contact. Much easier to find out now than after glue is set.

Once you happy you can fix track to baseboard, again there are two ways to do this. Track pins or glue. My preferance is glue, reason being you don’t need to pre drill fiddly holes in the sleepers and you don’t end up with unsightly pins on your track. I use Bostic all perpose, simply put the glue on the baseboard and lay track. Weight it down and once dry jobs a good un. The only caveat to that is make sure no glue touches the moving parts of the points.

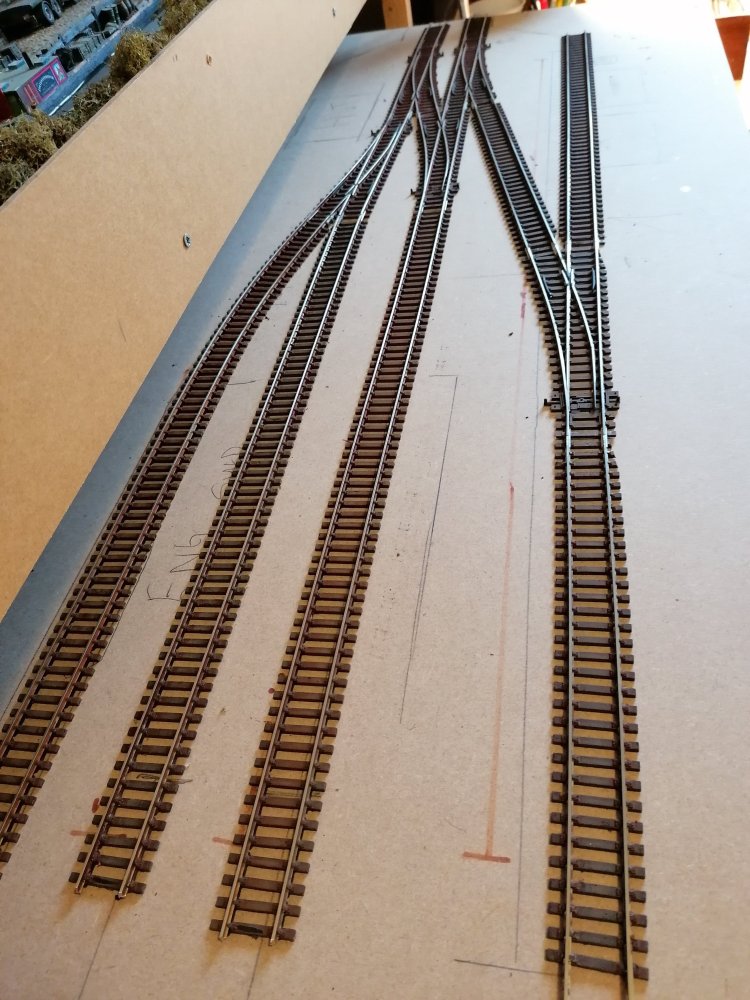
As you can see above soon your track plan will be a reality, question is will it work?

Above you can see the dropper wires coming from the track, colour coded so + and – can always be identified. Earlier I mentioned the Bus, now I have no idea why its called that but I’m sure somebody will tell me. Put simply DCC track is powered all the time so by fixing the dropper wires to the main power controller via a “loop” joined together using lego style joiners your layout is powered.

You can see above all brown wires are + and green -.

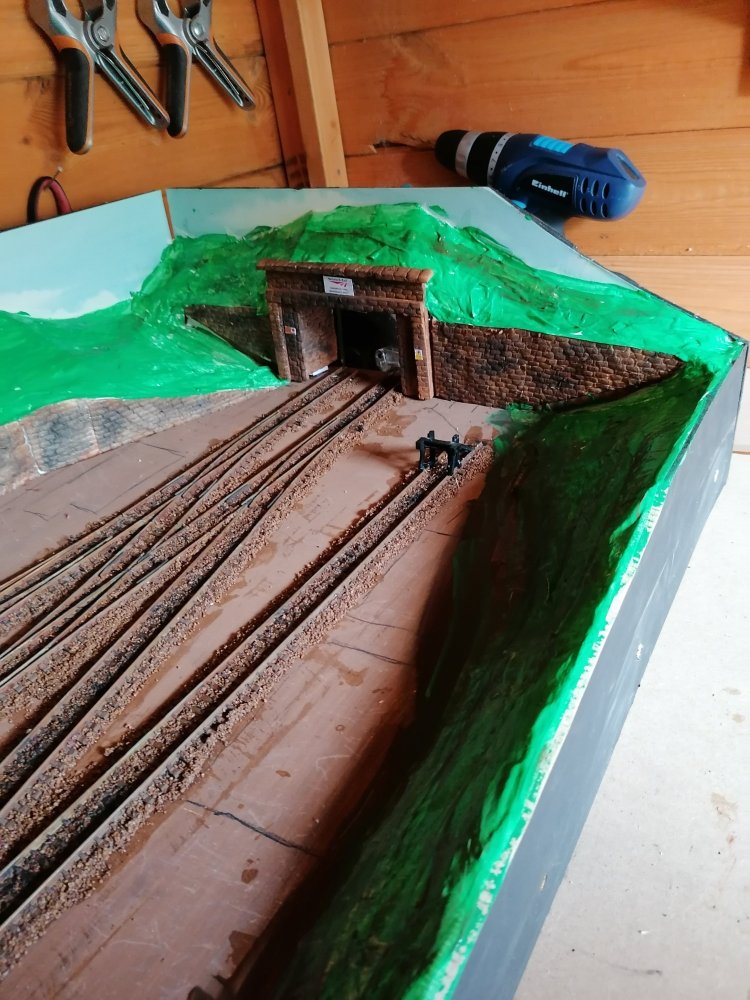
Once done a quick base coat of brown and we’re ready to try it out.

Next time, hopefully a video of a moving train, engine shed update and fixing the back boards.

Cheers Alan.

STARTING TO TAKE SHAPE

Welcome to this week’s blog, you join me having spent a day track laying and electrics. Now I’ll be the first to admit that electrics ain’t my strong point but thankfully modelling in DCC it’s fairly streight forward. This will be covered in a future blog so let’s move on to todays blog.

Last time we looked at the track plan for SHIREBROOK YARD so today we’ll look at the other three in the range.

SHIREBROOK STATION.

Every railway it seems has a station and mine is no exception. Offcourse being a micro layout space is my issue (again).

I plumped for a small village branch line with goods as well as passengers. Not only does this reflect a real life situation as it allows for passenger and goods traffic but from an operational point of view it gives plenty of scope for shunting.

As you can see it’s a fairly simple branch line with a run around loop to allow the engine to run around the train and shunt the goods wagons too and from the goods shed and siding.

SHIREBROOK COAL.

My third layout is a different slant on the engine shed in SHIREBROOK YARD. This time as well as a single track shed there is also a raised coal Shute and water tower. The first thing to say is that the upper track to the coal Shute not only gives operational features but also brings an upper level thus adding a new dimension to the layout.

Once the engine had re fuelled it then come back on itself for water before parking up ready for the next service.

SHIREBROOK GOODS.

The fourth in the series is a simple goods yard allowing for those of us who like to shunt to our hearts content to do just that. Shunting was a very important part of the daily running of any yard, getting the wagons in the correct order so that they can be delivered to the right place was paramount.

So there you have it, 4 layouts put to paper but offcourse the proof of the pudding is in the eating so next we need to get from paper to baseboard.

As you can see there’s really only one way and that’s to draw you plan out on your base board and see if it fits.

Offcourse not only am I talking about track but also any buildings you may have and not forgetting scenery. By scenery I mean the world on which your layout lives, cuttings, fields, tunnels, waterways etc.

Talking of the world the layout is based in let’s just look at back scenes or back boards as some call them. These are what defines the sides of your layout.

You may choose to paint your own and indeed if your painting skills are good then it will look good however, mine aren’t so I go with Peco back drops that are put on with double sided tape (glue bubbles).

As you can see the back board is and industrial scene which at the moment doesn’t look too bad, however when you join them together they don’t always run into each other. At this stage this is not a problem because when I come to putting in hills and trees this will be hidden, more of which in a later blog.

Well that’s it for this blog, next week it’s track weathering, track laying and electrics. This means offcourse that we’re getting to that magic moment when a train moves on our layout!

Cheers Alan.

I HAVE A CUNNING PLAN.

Hi and welcome my latest Shirebrook yard blog.

Somebody once said “measure twice, cut once”. Now I agree if you cutting wood that’s great advice and from a railway modellers point of view I can’t stress enough how important planning is. Soon we will get on to the good bit, track planning but before that it’s important to have the right tools for the job and the right invironment to work in. I for instance as you can see have a limited space to work with in my railway room. My good lady is also not a fan of me using spray paints, turps washes etc in the house and I’ve got to be honest it does whiff a bit! The solution is the good old garden shed which as I’ve said previously is not my preferred choice as a railway room but as a second workshop it’s perfect. (As you can see, although it’s not yet finished) . After a day clearing the shed out (many spiders met their match that day!) the next job was to get the tools for the job.

Having the right equipment might sound a obvious thing to say but my advice is to get good quality tools to do the job, my workbench as you can see cost a bit more but its much sturdier. Over the years I’ve acquired a whole host of tools to build railways but to build to a standard for selling on to the public or indeed for your own layout this is an area not to cut corners on. As and when I’m using various tools over the coming weeks I’ll talk in a little more detail.

So we’ve got the tools, we’ve got workings space now we need a plan for in my case the micro layout range and the dioramas for my Ebay shop.

First things first, the baseboard. I have always found 6mm MDF to be adequate for this task. It’s strong and just as importantly fairly inexpensive. Plywood can also be used but this is more expensive and after all railways don’t come cheap so where I can I’ll try and save a bit. As you can see I’ve got some 1200 x 600 boards ready for cutting and indeed you can just make out the first one is marked up.

The next step is to strengthen it with plywood battoning, not only does this make the board more rigid it also keeps them level which when it comes to running trains is paramount.

So thats the planning done and the baseboard built. At this point I should point out that as I’m building micro layouts by definition they are to fit in small spaces and the track plan fits the board rather than designing the railway and then building the required size base boards which is probably the normal way of doing it.

On the next blog I’ll show how I came up with the themes for the layouts and the track plan.

For now though, happy modelling.

Alan.

HORBY JUNCTION A PICTORIAL GUIDE.

As promised here is HORBY Junction in pictures. I should stress up front like most layouts this is not the finished article (See back drop). Two pannier tanks readying for a days work and plenty of passengers for the first service of the day. The morning shift at the goods yard getting ready for one of the tanks.

Getting ready for the milk run.

Every good layout has water.

So at the other end of the layout a DMU gets ready to depart.

It seems that somebody on the tow path had a good night. (Oops).

So that’s my storey so far but it doesn’t end there. Those who know me will have had a chuckle at the name “Railway Imp” a nod to my other passion Lincoln City FC. Over the coming weeks I’ll hopefully share how Shirebrook Yard is planned, built and hopefully launched into the market. Reality is I have no idea if this will be successful or not but as they say nothing ventured nothing gained. If I can inspire one of you then it’s worth it.

Next up the planning.

Alan.

Horby Junction

HORBY JUNCTION.

Welcome to the second blog in this story of my love of model railways and how I turned a hobby into a cottage industry. As I’ve already said like most model railway fanatics it all stared with a Christmas gift when I was just a lad. So how I hear you say did that turn into the Horby Junction layout which is in my spare bedroom?

First decision is what scale to build the model in, by scale I basically mean the size of the trains, track and buildings. Most are either OO gauge or N gauge. Without getting too technical OO scale is the train set we all got as a kid and N gauge is much smaller in size. The advantage of N is you can fit a lot more railway in a small space but the disadvantage is its quite fiddly to build so on balance I plumped for OO gauge. Now I should say that I am in the process of planning a small shelf N gauge railway and I do make models to sell in N gauge (more of which in a future blog).

Once I decided to go down the OO route the next puzzle is the biggest one most modeller face, where to build it. Space is the railway modellers nemesis as most of us don’t have the luxury of a loft or basement, some build in garages and outbuildings and this can work well but temperature changes in summer and winter for both layout and modeller can be shall we say challenging! So after much deliberation our old friend the box bedroom was chosen as the place I would spend many happy hours over the next few years.

Next up was the question of power and control of the trains themselves. The old train set I had as a kid was analogue, put simply the track is powered through a transformer and when the dial is turned the train will move. The problem with this is when you put another train on the track it will move as well so you then have to have isolating tracks etc In recent years however there is a new kid in town, DCC or digital as its known. With this system the track is powered all the time and the train is controlled by a controller that sends a signal to a chip in each individual engine so I can run as many trains as I like without little accidents. Now this is a very basic explanation on how is works for the purposes of this blog and indeed things such as sound chips make DCC the future of model railways. However that’s enough science!

The last decision to make is the track plan itself, what the layout will look like. As it seems with most things in this hobby there are many options, I plumped for and “end to end” configuration. Basically two stations at each end of the baseboard and trains run between them. Again this decision is based on how much space you have to model in, for instance in a large room you could have a full circle of tracks running into a fiddle yard representing the “rest of the country” enabling complex running patterns.

So over the next 5 years or so many happy hours were spent is said bedroom building baseboards, track laying, building scenery, buildings and detailing the model to get to where I am today. I will in the next blog put some pictures up and explain a bit more how the railway evolved but the purpose of this blog was to give some back round into how I got to where I am today with my layout.

The advent of the Internet and things such as EBAY means that running a small business from home its much easier to get you products out to customers but these blogs are more than that, over the next few weeks I’ll show you how I plan the layouts, buildings and track side dioramas. Hopefully this will inspire you to get involved in this great hobby. (you may even want to buy some to get you started).

So for now thanks for reading and I hope over the next few weeks I can share with you how I create my models.

Alan.

Welcome To My Blog

Hi all and welcome to my new blog.

This blogging lark is new to me so bear with until I get the hang of it.

 So what’s it all about you ask? All things model railway I suppose, to give you some back round like most modellers I got a Hornby train set for Christmas one year and as they say I was hooked. I can remember the excitement of putting the oval track together, plugging in the power and getting the shinny new class 25 to move. That progressed to a bit of shunting, a small building and then the real kicker, I nailed (yes nailed!) it to my bedroom floor and made a papier mache tunnel for it to run through and would watch it go round and round disappearing and then re appearing from the darkness. Oh the hours of fun I had but all joking apart that’s what got me hooked. Fast forward School years, 12 years in the RAF and a child and here we are.

I’ll be honest it’s more about the design and building of the layout than the trains themselves, yes I know the difference between the Flying Scotsman and a class 08 and I love all trains, visit preserved lines and do the whole railway thing but its the layout itself that really gets my juices flowing.

Tacking a piece of MDF and turning it into a working model is what its about for me and hopefully I can at the very least inspire others to get involved in the wonderful world of model railways.

At this point I think its right I declare that I do have a small homegrown business producing model railway building, lineside dioramas and recently this has grown into full grown production of working micro layouts that hopefully can act as a kick start for you to either re kindle a child hood dream or just get involved. (more on this in later blogs).

Hopefully this will be a regular blog, if I can find the time between building railways and my other passion Lincoln City FC! For now I leave you with a picture of a Metcalfe double engine card kit that I have enhanced and weathered ready to go on my “Shirebrook Yard” micro layout.

In the next blog I’ll talk about “Horby Junction” which is my permanent OO gauge layout, and start to look at the latest project “Shirebrook Yard” engine shed micro layout.

Cheers Alan.

Design a site like this with WordPress.com
Get started